

Magnetism often feels permanent and unchangeable. We see magnets hold fast for years. Their force seems to last forever. But what if you need to weaken or completely neutralize that force?
You might be an engineer designing a sensitive assembly. Perhaps you’re a technician cleaning machined parts. Maybe you’re a teacher demonstrating a scientific principle. Or you could be a DIYer with a tool that has become inconveniently magnetized. Whatever your situation, the need to control and eliminate magnetism is a real challenge. The good news? It’s entirely possible.
Permanent magnets can be demagnetized. Even powerful rare-earth types like neodymium. This process is called degaussing. It works by disrupting the internal structure that gives a magnet its power.
Table of Contents
What You'll Learn Here
This guide provides a comprehensive, practical approach to demagnetization. We’ll move from the foundational science to actionable, step-by-step methods. These work in various settings.
- The Core Science: Why magnets can be demagnetized in the first place.
- Method 1: Using Heat – the most definitive but dangerous method.
- Method 2: Using Impact – the simplest but least reliable technique.
- Method 3: Using an Alternating Current (AC) Field – the industrial standard.
- Decision Guide: How to choose the right method for your specific magnet and situation.
- Critical Safety: A non-negotiable checklist for every method.
The Science of Magnetism
To effectively demagnetize something, we first need to understand what makes it magnetic. The answer lies at a microscopic level. It’s within the material’s internal structure. It’s not magic – it’s physics.
This understanding is crucial. It transforms demagnetization from a guessing game into a controlled process. You can select the right method and troubleshoot why a particular technique might or might not be working.
Understanding Magnetic Domains
Imagine the material of a magnet filled with countless tiny, individual magnets. These are called magnetic domains. Each domain has its own north and south pole.
In an unmagnetized piece of ferrous material, like a common iron nail, these domains point in random directions. Their individual magnetic fields cancel each other out. So the nail as a whole does not act as a magnet.
To create a permanent magnet, the material is exposed to a very strong external magnetic field during manufacturing. This powerful field forces all the individual magnetic domains to align. They all point in the same direction.
Think of it like a large crowd of people. If everyone is looking in a random direction, there is no collective focus. If a leader tells everyone to face forward, the entire crowd becomes aligned and directs its attention as one. This alignment of domains creates the powerful, unified magnetic field we observe externally.
A simple illustration would show two boxes. The first, labeled “Unmagnetized,” is filled with arrows pointing in every random direction. The second, labeled “Magnetized,” shows all the arrows neatly aligned in a single direction.
The Goal: Creating Chaos
If magnetization is the process of creating order, then demagnetization is the process of creating chaos. Our goal is to introduce enough energy into the magnet to break the bonds holding the domains in alignment.
We need to shake, heat, or electrically jolt the domains. This makes them fall back into their natural, random state. Once the domains are randomized again, their individual fields cancel each other out. The macroscopic magnetic field disappears.
All three methods we will discuss are simply different ways of delivering this disruptive energy to the magnetic domains. Heat, impact, and AC fields each work through this same principle.
Permanent vs. Temporary
It’s important to distinguish between permanent and temporary magnets. A temporary magnet loses its magnetism easily. Examples include an electromagnet or a screwdriver that becomes weakly magnetic after touching a strong magnet.
Permanent magnets are made from “hard” magnetic materials. They’re designed to resist this randomization. This resistance to being demagnetized is a measurable property called coercivity.
High-coercivity magnets are very difficult to demagnetize. These include neodymium and samarium-cobalt. Low-coercivity magnets are much easier to weaken. Examples include alnico or older iron magnets. This guide focuses on methods to overcome the coercivity of permanent magnets.
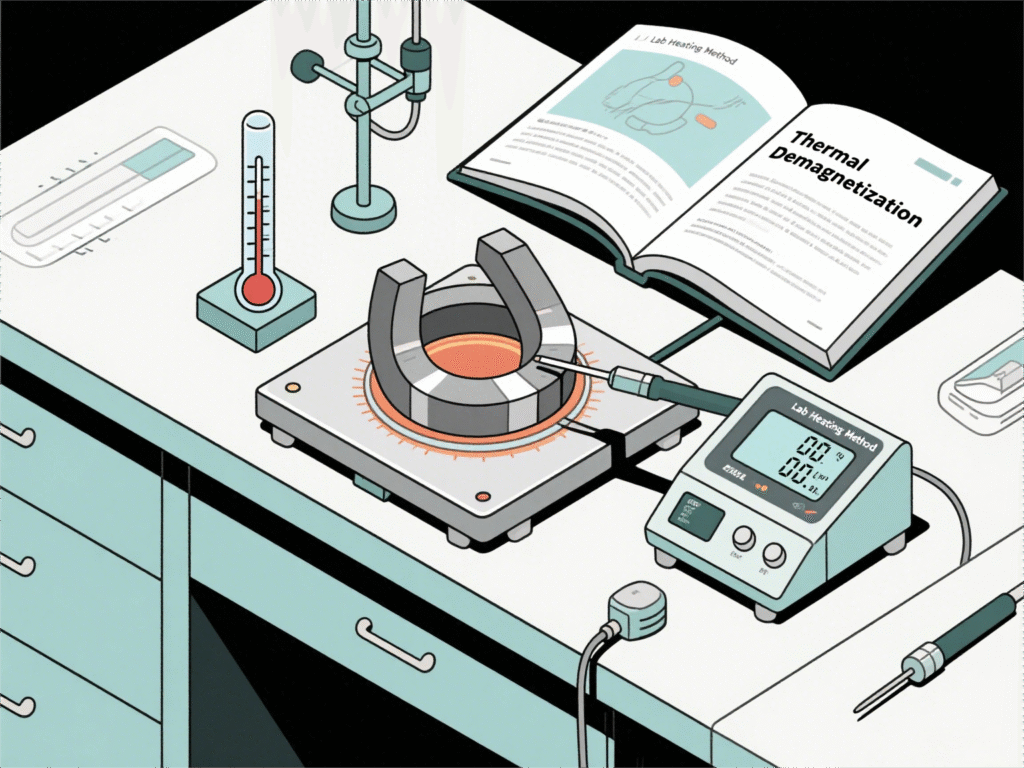
Method 1: Heat Demagnetization
Using heat is the most definitive way to fully demagnetize a permanent magnet. It relies on a fundamental property of magnetic materials. When done correctly, it guarantees complete demagnetization.
This method is powerful but also carries significant risks. It requires specialized equipment and a deep respect for safety protocols. This makes it best suited for lab, workshop, or industrial settings.
The Curie Temperature
Every magnetic material has a specific temperature known as its Curie temperature or Curie point. This is the critical threshold at which the material loses its permanent magnetic properties.
As you heat a magnet, you’re feeding thermal energy into its structure. This energy causes the atoms within the material to vibrate more and more violently.
At the Curie temperature, this thermal vibration becomes so intense that it overcomes the forces holding the magnetic domains in their neat alignment. The domains are shaken loose and randomize. This completely erases the magnet’s field.
It’s crucial to know the Curie point for your specific magnet material. Heating below this temperature will only temporarily weaken the magnet. It may recover some of its strength upon cooling. You must heat the magnet above its Curie point.
A Heat Demagnetization Guide
Typical Curie Temperature (°C / °F) | Notes | |
~310°C / 590°F | Can lose significant strength at much lower temperatures. | |
~450°C / 842°F | Brittle and can crack from thermal shock if heated too quickly. | |
700-800°C / 1292-1472°F | Designed for high-temperature applications; requires high heat. | |
700-850°C / 1292-1562°F | Very stable; requires a furnace, kiln, or forge. |
ollowing a strict, methodical process is essential for both success and safety. Do not attempt this without the proper equipment and precautions.
- Safety First. This is the most critical step. You will be working with extreme temperatures. Mandatory Personal Protective Equipment (PPE) includes high-temperature-rated gloves, full-coverage safety goggles or a face shield, and natural fiber clothing (like cotton or wool). Work in a well-ventilated area with a fire extinguisher readily accessible.
- Identify the Material. You must know what your magnet is made of to find its Curie temperature from the chart above. If you’re unsure, you’ll have to experiment, which increases risk. Neodymium magnets are typically silver and metallic. Ferrite magnets are dark gray and ceramic-like.
- Controlled Heating. The magnet must be heated slowly and evenly to prevent thermal shock. This can cause it to crack or shatter. A programmable kiln or furnace is the ideal tool. A forge or a powerful blowtorch can also be used, but it’s much harder to control the temperature and ensure even heating.
- Use a Safe Surface. Inside the kiln or heating area, place the magnet on a fire-proof surface like a fire brick. Never place it directly on a metal shelf. This can act as a heat sink, lead to uneven heating, and potentially warp.
- Exceed the Curie Point. Heat the magnet until it’s well above its Curie temperature. It’s common practice to hold it at that temperature for several minutes. This ensures the entire volume of the material has been thoroughly heated. The magnet will often glow red or orange at these temperatures.
- The Cooling Process. This step is just as important as heating. The magnet must be allowed to cool in a magnetically neutral environment. Simply turn off the kiln and let it cool down slowly over several hours.
- Avoid Re-magnetization. Do not move the magnet while it’s hot. If you cool it in the presence of any magnetic field, including the Earth’s own magnetic field, it can become weakly re-magnetized as it passes back through the Curie point. Cooling it in place is the safest option.
- Verification. Once the magnet is completely cool to the touch, test it. A formerly strong magnet should no longer be able to pick up a paperclip or even attract a piece of iron. For technical applications, a gaussmeter can be used to confirm the residual magnetic field is at or near zero.
Pros and Cons of Heat
This method is not for every situation. Weigh the benefits against the drawbacks carefully.
Pros: It’s highly effective and provides a permanent, complete demagnetization. For bulk processing of parts or for scientific demonstrations, it’s a reliable and conclusive method.
Cons: It requires specialized, expensive equipment like a kiln. The safety risks are very high, including severe burns and fire hazards. The process can physically damage the magnet or its coating. It’s completely unsuitable for magnets embedded in other materials like plastic or electronics.
Method 2: Impact or Vibration
This is the oldest, simplest, and most accessible method for attempting to demagnetize a magnet. It requires no special equipment beyond basic tools and a sturdy surface.
However, what it offers in simplicity, it often lacks in effectiveness. This technique is more about brute force than precision.

Shaking Domains Loose
The principle behind this method is straightforward. A sharp physical impact delivers a wave of mechanical energy through the magnet.
This jolt of energy can be enough to knock some of the aligned magnetic domains out of their positions. It causes them to randomize. Similarly, sustained, strong vibration can gradually shake the domains into a more chaotic state.
Think of it like a perfectly stacked deck of cards. A sharp rap on the side of the table can be enough to make the stack messy and misaligned.
An Impact Demagnetization Guide
While simple, taking preparatory steps can improve your chances of success. More importantly, they keep you safe.
- Safety and Preparation. Always wear safety glasses or goggles. This is not optional. Brittle magnets, especially ferrite (ceramic) types, can easily shatter upon impact. They send sharp fragments flying. It’s wise to wrap the magnet in a thick cloth or shop towel to help contain any pieces if it breaks.
- Choose Your Surface. You need a very hard and solid surface that will not absorb the impact. Examples include a steel anvil, a thick metal vise, or a concrete workshop floor. A wooden workbench will absorb too much of the energy.
- Applying Force. Use a heavy hammer, such as a small sledge or ball-peen hammer. The goal is to deliver a series of sharp, hard strikes to the magnet. You’re trying to send a shockwave through the material, not necessarily smash it to pieces. Though that’s a definite risk.
- Orientation Matters. For a bar-shaped magnet, striking it on its ends, along its length, is generally more effective at disrupting the domains than striking its flat sides. We’ve found that orienting the magnet so its length runs East-to-West can be slightly more effective. This alignment is perpendicular to the Earth’s magnetic field. It may help prevent any minor re-magnetizing influence during the impacts.
- Repetition and Verification. This method is rarely successful with a single blow. It requires repeated strikes. After a dozen or so strikes, stop and test the magnet’s strength. See if it can still pick up a paperclip or other small ferrous object. You may need to repeat the process many times.
Pros and Cons of Impact
You must have realistic expectations when using this method.
Pros: It requires no special equipment and is very simple to attempt. For very old, weak, or low-coercivity magnets, it might be enough to weaken them noticeably.
Cons: The results are highly unpredictable and often disappointing. It’s largely ineffective on modern high-coercivity magnets like neodymium. There’s a very high risk of shattering the magnet, especially brittle ceramic types. The process is uncontrolled and provides, at best, partial demagnetization.
Method 3: An AC Field
Using an alternating current (AC) magnetic field is the most controlled, reliable, and non-destructive method for demagnetization. It’s the gold standard in industrial, manufacturing, and repair settings.
This technique uses electromagnetism to precisely randomize the magnetic domains. It scales from large industrial machinery down to practical DIY solutions for the experienced hobbyist.
Rapid Field Reversal
An alternating electrical current, like the one from a wall outlet, does not flow steadily in one direction. It rapidly reverses its direction. Typically 50 or 60 times per second (50/60 Hz).
When this AC is run through a coil of wire, it creates a magnetic field that also rapidly flips its polarity. The north and south poles of the field switch back and forth 50 or 60 times every second.
When you place a permanent magnet inside this rapidly alternating field, its magnetic domains are violently forced to try and keep up with the changes. They’re flipped back and forth, scrambling their alignment.
The key to demagnetization is to then slowly withdraw the magnet from the coil while the AC field is still active. As the magnet moves farther away, the influence of the alternating field weakens. The domains are still being flipped, but with less and less force. By the time the magnet is clear of the field, the domains have no strong force directing them. They settle into a random, chaotic, and demagnetized state.
Industrial Degaussers
In professional settings, a dedicated machine called a degausser or demagnetizer is used. These come in various forms for different tasks.
Aperture or tunnel degaussers are large coils that parts pass through on a conveyor belt. These are used in manufacturing to demagnetize machined components that have picked up magnetism from magnetic chucks or lifting magnets. This is critical to prevent them from attracting metal filings during assembly.
Plate or surface degaussers are flat surfaces that generate an AC field. Tools, dies, and other components can be passed over the surface to remove unwanted magnetism. They’re common in tool rooms and after processes like magnetic particle inspection.
A Practical DIY Setup
For the electronics hobbyist or technician with the proper knowledge, a simple degaussing coil can be constructed.
Disclaimer: This project involves working with mains electricity, which is extremely dangerous and can be lethal. Do not attempt this unless you’re experienced and fully understand electrical safety, circuits, and proper insulation techniques.
The Coil: The simplest way to create a degaussing coil is to salvage the primary winding from an old power transformer or a large solenoid. Alternatively, you can create one by wrapping many turns (hundreds) of insulated copper wire (magnet wire) around a hollow, non-conductive tube. Use a sturdy cardboard or PVC pipe.
The Process:
- Safety Check. Ensure your coil is well-insulated and that all connections are secure and shielded. Position the setup on a non-conductive surface away from any flammable materials.
- Energize the Coil. Connect the coil to an AC power source. For safety, it’s highly advisable to use a step-down transformer to work with a lower voltage (e.g., 12-24V AC) if your coil is designed for it. If using mains voltage, exercise extreme caution.
- Insert the Magnet. Place the magnet you wish to demagnetize into the center of the coil’s opening. This is where the alternating magnetic field is strongest.
- Slow and Smooth Withdrawal. This is the most important part of the process. While the coil is energized, slowly and smoothly pull the magnet straight out from the center of the coil. Continue pulling it away to a distance of at least a meter (several feet) before changing its direction. The slow, steady withdrawal is what allows the domains to settle into a random state.
- De-energize and Test. Only after the magnet is far away from the coil should you turn off the power. Bring the magnet back and test its strength. It should be significantly weakened or completely inert.
Pros and Cons of AC Fields
This method is the professional choice for good reason.
Pros: It’s extremely effective, highly controllable, and non-destructive to the magnet itself. It’s the standard for any critical industrial or technical application.
Cons: Professional degaussing equipment is expensive. The DIY version carries a very high risk of electrocution if you’re not an expert in electronics and electrical safety. It’s not a project for beginners.
Method Selection Guide
With three distinct methods available, choosing the right one is critical. The best technique depends entirely on your magnet, your goal, your available equipment, and your tolerance for risk.
This section will help you analyze your situation and make a confident, safe, and effective choice.
Key Decision Factors
Before you pick up a hammer or wire up a coil, ask yourself these questions:
- Magnet Type and Strength: Are you dealing with a modern, high-coercivity neodymium magnet or an older, weaker alnico or ferrite magnet? Stronger magnets require more energy to demagnetize.
- Your Goal: Do you need complete, verifiable demagnetization to near-zero gauss? Or are you just trying to weaken a magnet that has become a nuisance?
- Available Equipment: Do you have access to a kiln, a professional degausser, or the components and skills for a DIY coil? Or are you limited to basic hand tools?
- Safety Tolerance: Are you in a controlled environment where you can manage the risks of extreme heat, high voltage, or flying debris?
- Is the Magnet Embedded?: Is the magnet a standalone part? Or is it housed inside a plastic assembly, an electronic device, or a piece of machinery where heat or impact would cause collateral damage?
Quick Comparison Table
This table summarizes the methods to help you decide at a glance.
Method | Effectiveness | Required Equipment | Safety Risk | Best For… |
Heat (Curie Point) | Very High | Kiln, Forge, Torch, PPE | High (Fire, Burns) | Lab settings, bulk part processing, when the magnet is a standalone piece and the material is known. |
Impact/Vibration | Low / Unpredictable | Hammer, Anvil, PPE | Medium (Shattering) | Weak, old magnets; when no other option is available; quick attempts on non-critical items. |
AC Field (Degausser) | Very High & Controlled | Professional Degausser | Low (with pro gear) | Industrial QC, demagnetizing tools/parts, electronics repair, sensitive applications. |
AC Field (DIY Coil) | High | DIY Coil, AC Source, PPE | Very High (Electrocution) | Experienced hobbyists and engineers who understand electrical safety; non-critical projects. |
Scenario-Based Advice
Let’s apply this framework to some common situations.
“I’m a science teacher with a set of old Alnico bar magnets for a lab demonstration.”
Your best option is the AC field method. If your school’s physics lab has a degaussing coil, that’s the perfect tool. If not, the heat method can serve as a powerful demonstration of the Curie point. But only with extreme supervision, proper PPE, and a controlled environment like a school kiln. The impact method is too unreliable for a predictable classroom result.
“I’m a DIYer, and a strong neodymium magnet is stuck to the side of my metal toolbox. I just want to weaken it enough to get it off.”
Here, the goal is not complete demagnetization but weakening. Since neodymium magnets have a high coercivity, the impact method is unlikely to work and risks shattering the magnet. The AC method is ideal but requires specific gear. A tricky but possible approach is localized heating with a powerful blowtorch on one edge of the magnet. But this is risky and can damage the toolbox finish. Often, mechanical solutions (levers, wedges) are better than attempting demagnetization in this scenario.
“We are a manufacturing facility, and our machined steel parts are becoming magnetized after grinding, causing problems in assembly.”
This is a clear-cut industrial problem with a single professional solution. An industrial degausser is required. Either a tunnel type for a conveyor line or a plate type for manual processing. Any other method is too slow, unreliable, and unprofessional for a quality control process.
Safety First: A Critical Checklist
Learning how to demagnetize a magnet is not a risk-free activity. Each method introduces hazards that must be respected and mitigated. This checklist is non-negotiable.
A Non-Negotiable Checklist
Review this before you begin, regardless of the method you choose.
- Personal Protective Equipment (PPE): At a minimum, always wear safety glasses to protect your eyes from shattering material. For the heat method, heat-resistant gloves and a face shield are mandatory.
- Fire Safety: When using the heat method, work in a well-ventilated area far from any flammable materials like wood, paper, or chemicals. Keep a suitable fire extinguisher (e.g., ABC or Class D for metal fires) within arm’s reach.
- Electrical Hazard: Never attempt to build or use a DIY AC demagnetizer unless you’re qualified and confident in your ability to handle mains voltage safely. Faulty wiring or improper handling can be fatal.
- Brittle Magnets: Be acutely aware that ceramic (ferrite) and, to a lesser extent, neodymium magnets are brittle. They can shatter like glass under impact or thermal shock. This creates extremely sharp projectiles.
- Powerful Magnets: Before you even begin, handle strong neodymium magnets with extreme care. They can snap together with enough force to break bones or cause severe pinching injuries. Keep them away from electronics and medical devices.
Conclusion: Mastering the Force
Demagnetization transforms magnetism from a static property into a controllable variable. It’s the process of using energy to disrupt internal order and randomize magnetic domains. This energy comes in the form of heat, impact, or an alternating field.
The choice of method is not arbitrary. It’s a calculated decision based on the magnet’s material, your specific goal, the equipment you have, and the level of risk you’re prepared to manage.
By understanding these principles and following safe practices, you gain greater control over this fundamental force. Whether you’re solving a practical problem in a workshop, ensuring quality in a factory, or demonstrating a core concept of physics, knowing how to demagnetize a permanent magnet is a valuable skill.
We are a manufacturer specializing in the research and development of magnets with years of industry experience. Our product offerings include NdFeB magnets, ferrite magnets, and custom magnetic components. Our goal is to provide high-quality magnetic solutions to customers worldwide, and we also offer OEM/ODM customization services.If you have specific procurement requirements, welcome to contact professional magnet manufacturers for quotes and technical support.
Facebook
Twitter
LinkedIn
WhatsApp